Errand Cloud
Errand is designed to run on your own hardware — your home server, personal computer, or any device you control. By default, it’s only accessible from your local network. That’s great for privacy, but what if you need to manage a task while you’re away from home? Or connect to services like Slack and GitHub that need to reach your server?
That’s where Errand Cloud comes in.
What is Errand Cloud?
Section titled “What is Errand Cloud?”Errand Cloud is an optional service that gives your local Errand installation superpowers without compromising your privacy. It provides three core capabilities:
- Remote access — Manage your tasks from anywhere via https://errand.cloud, with a mobile-friendly interface that works on phones and tablets
- Webhook relay — Services like Slack, Jira, and GitHub need a public URL to send events to. Since your home server doesn’t have one, Errand Cloud receives those webhooks and forwards them to your installation
- Cloud authentication — For integrations with Google Workspace and Microsoft 365, Errand Cloud acts as a secure OAuth proxy to handle authentication flows that aren’t possible on a local server
All communication between your installation and the cloud service is encrypted. Your data never sits on the cloud service — it only passes through. All your task data stays on your local installation.
How It Works
Section titled “How It Works”The connection between your local Errand installation and Errand Cloud is straightforward:
- Your Errand installation maintains a persistent encrypted connection to the cloud service
- When you access errand.cloud, your requests are relayed through this connection to your local server
- Webhooks from services like Slack are received by the cloud and forwarded to your installation
- If your installation goes offline, webhooks are queued for up to 48 hours until it comes back online
Setting Up Errand Cloud
Section titled “Setting Up Errand Cloud”Getting connected takes just a few minutes.
Step 1: Create an Account
Section titled “Step 1: Create an Account”Visit https://errand.cloud and create your account.
Step 2: Subscribe to a Plan
Section titled “Step 2: Subscribe to a Plan”All new users receive a free trial period. Before that trial period expires, you should choose a monthly or annual subscription plan that works for you.
Step 3: Open Cloud Settings in Errand
Section titled “Step 3: Open Cloud Settings in Errand”In your Errand installation, go to Settings > Cloud Service.
Step 4: Connect Your Installation
Section titled “Step 4: Connect Your Installation”Click the “Connect” button and sign in with your Errand Cloud account.
Step 5: Confirm the Connection
Section titled “Step 5: Confirm the Connection”Once connected, you’ll see your subscription status and cloud endpoints on the settings page.
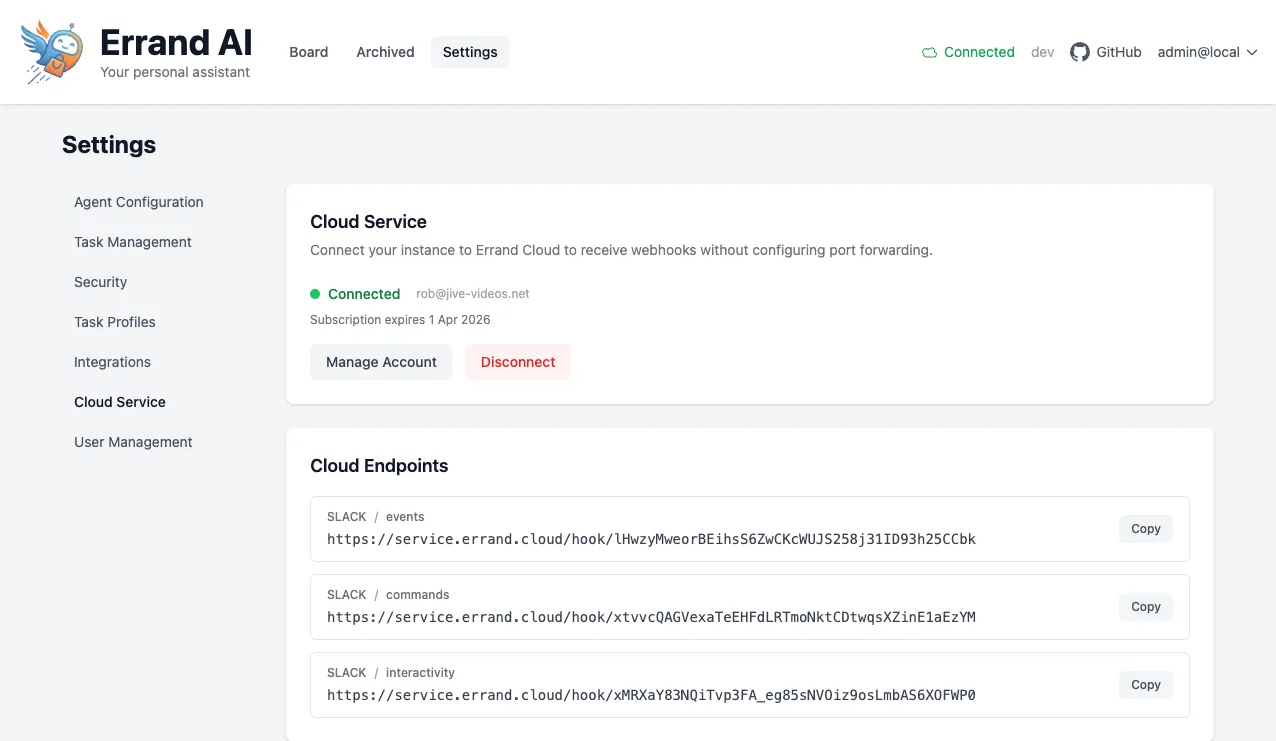
Managing Your Account
Section titled “Managing Your Account”From the Cloud Service settings page, you can:
- Click “Manage Account” to access subscription management, update payment details, or change your plan
- Click “Disconnect” to unlink your installation from Errand Cloud
Privacy and Data
Section titled “Privacy and Data”The cloud service never stores your task data. It only relays requests between your browser (or webhook senders) and your local installation. All your tasks, emails, configurations, and other data remain entirely on your own hardware.
Troubleshooting
Section titled “Troubleshooting”Not connecting to the cloud service?
- Check that your Errand server has an active internet connection
- Make sure your firewall isn’t blocking outbound connections from Errand
- Try disconnecting and reconnecting from the Cloud Service settings page
Subscription expired?
- Visit “Manage Account” from the Cloud Service settings page to renew your subscription
- Remote access and webhook relay will stop working until your subscription is active again